Discover how to quickly adjust your SendGrid SMTP settings for use with your LMS
Sendgrid offers a number of packages for a mail SMTP relay. For this article we have used the free account.
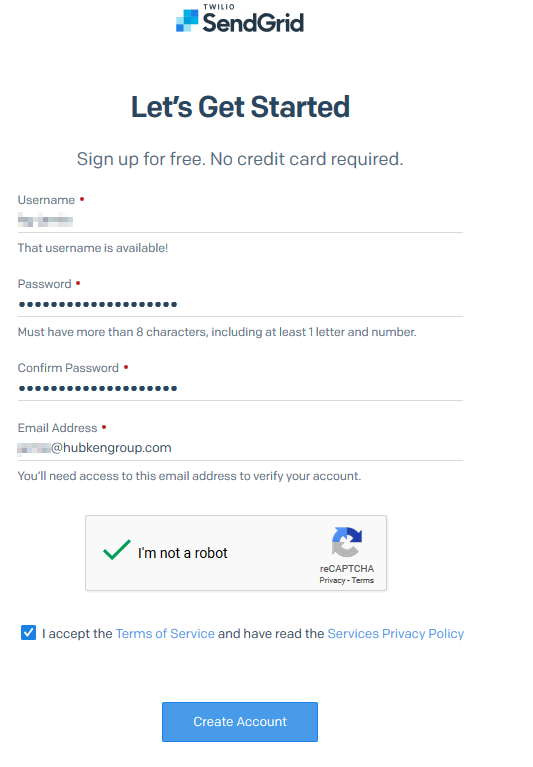
Navigate to https://signup.sendgrid.com/ to create your SendGrid account
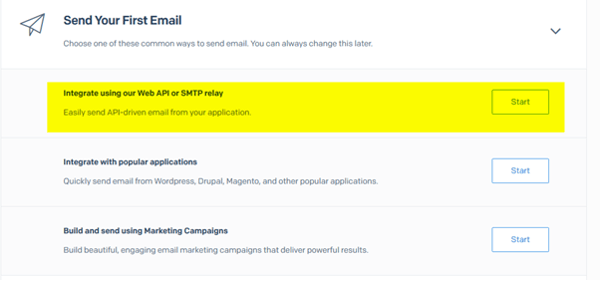
With the account created, select the option highlighted in Yellow above “Integrate using our web API or SMTP relay” and click start.
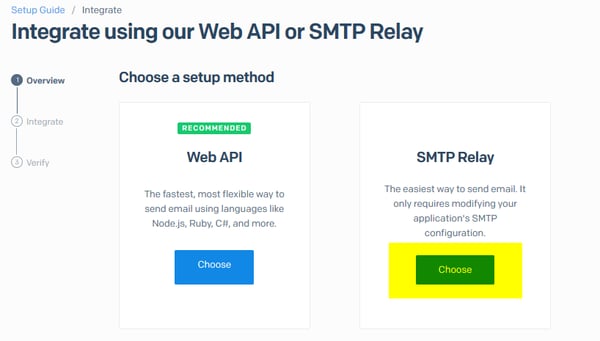
Select SMTP relay when prompted.
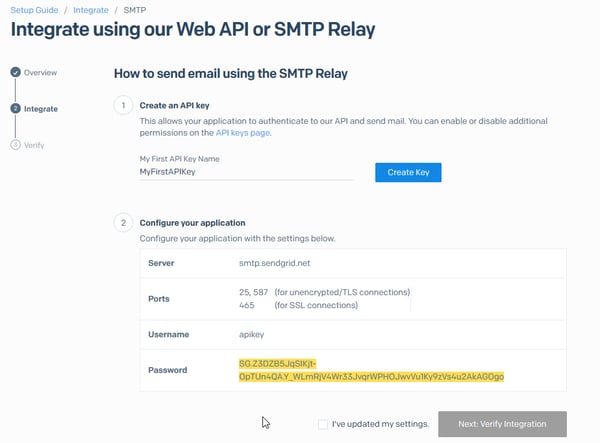
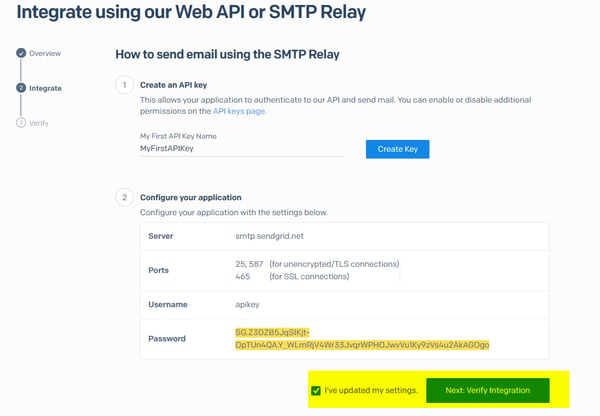
Type a string of text into the text area for “My First API Key Name” and click “Create Key”, this will generate your SMTP password.
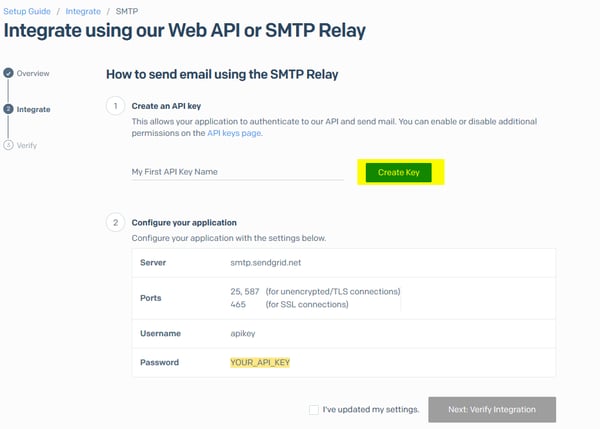
Be sure to make a note of this password in a secure location, as you will not be able to retrieve this later.
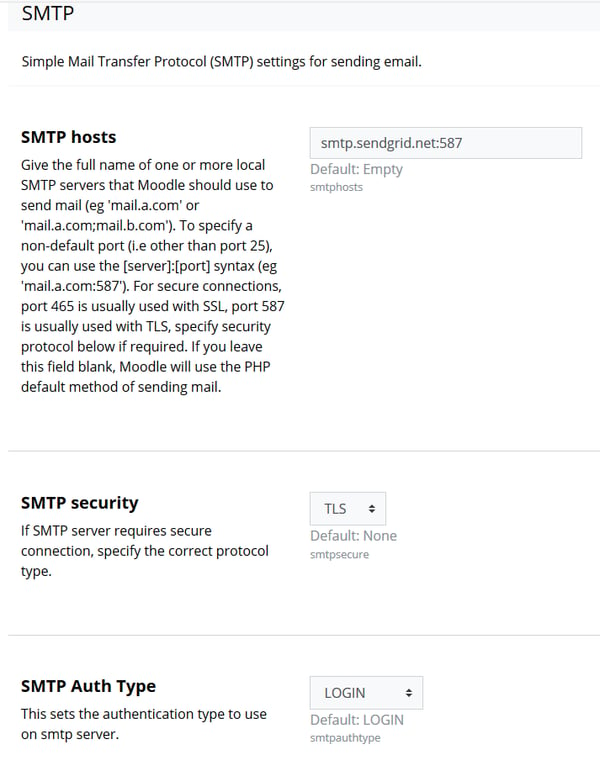
Now navigate to https://yoursite/admin/settings.php?section=outgoingmailconfig
to configure your SMTP settings, we recommend the following;
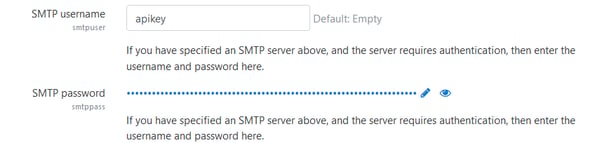
Then enter the SendGrid SMTP username as ‘apikey’ and the SMTP password as the Password generated earlier, then save changes.
With the settings saved in your Moodle or Totara site, you can now select the “I’ve updated my settings” within SendGrid and click the ‘Next’ button to verify the setup.
At this point you will want to send a test email to verify the integration, you can do this by creating a user account on the site with a valid email address and selecting the option ‘Generate password and notify user’ to send the user an email.
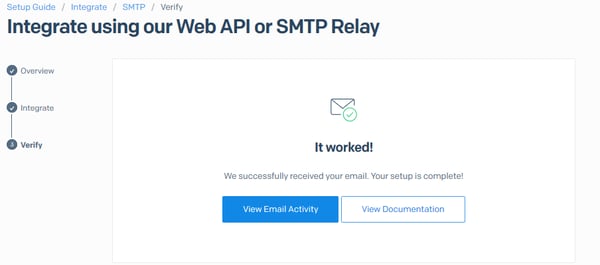
Once the account has been created click the ‘Verify integration’ button.
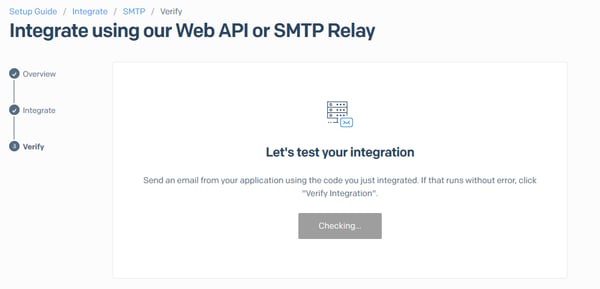
You should now receive a confirmation message within SendGrid to confirm the email has been sent. The email used for the account creation should have also received an email.